
Concrete sealing is the process of applying a protective coating to concrete surfaces — driveways, patios, walkways, garage floors, and foundations — to shield them from water, salt, oil, UV damage, and everyday wear. Sealing your concrete is one of the most cost-effective DIY maintenance tasks you can perform, extending the life of your surfaces by years or even decades and keeping them looking clean and new. A quality sealer prevents water from penetrating the concrete’s pores, which is critical in cold climates where freeze-thaw cycles can crack and spall unsealed concrete within a single winter. This guide walks you through everything you need to know to seal concrete yourself: why it matters, how to choose between penetrating and film-forming sealers, surface preparation, application methods, drying and curing, and a reapplication schedule to keep your concrete protected for the long haul.
Why Seal Your Concrete?
Concrete is porous. Even though it looks solid and impermeable, it’s actually full of microscopic capillaries and voids that absorb water, oils, salts, and other contaminants. Left unprotected, concrete degrades over time. Here’s what sealing prevents:
- Freeze-thaw damage — Water that seeps into concrete expands when it freezes, creating internal pressure that causes cracking, scaling, and spalling (surface flaking). This is the #1 cause of concrete deterioration in cold climates.
- Salt and de-icer damage — Road salts and chemical de-icers penetrate unsealed concrete and accelerate surface breakdown, especially in the first winter after a concrete pour.
- Oil and chemical stains — Sealer creates a barrier that prevents oil, grease, fertilizer, and other chemicals from soaking in, making cleanup easy.
- UV fading — Colored and stamped concrete fades in sunlight without a UV-blocking sealer.
- Efflorescence — The white, powdery mineral deposits that appear on concrete surfaces are reduced when water movement through the slab is blocked.
- Mold and mildew — Sealed concrete absorbs less moisture, reducing organic growth on shaded surfaces.
The bottom line: A $50–100 gallon of sealer can protect a $5,000 concrete investment. It’s one of the highest-ROI DIY tasks in home maintenance.
Materials & Tools Needed
- Concrete sealer — Choose based on your needs (see the comparison below).
- Pressure washer — For deep cleaning the surface before sealing.
- Roller and pan OR pump sprayer — For applying the sealer.
- Concrete etching solution — Opens the concrete pores for better sealer penetration (especially important for smooth or power-troweled surfaces).
- Drop cloth or plastic sheeting — To protect adjacent surfaces from overspray.
- Stiff-bristle brush or broom — For scrubbing the surface during cleaning.
- Degreaser or TSP (trisodium phosphate) — For removing oil stains before sealing.
- Safety gear — Chemical-resistant gloves, safety glasses, and a respirator mask (especially for solvent-based sealers).
- Painter’s tape — For masking edges along walls, joints, and adjacent surfaces.
Choosing the Right Sealer: Penetrating vs Film-Forming
The most important decision you’ll make is what type of sealer to use. There are two main categories, and they work in fundamentally different ways.
Penetrating Sealers (Silane/Siloxane)
These sealers soak into the concrete’s pores and react chemically with the silica in the concrete, forming a hydrophobic (water-repellent) barrier beneath the surface. They don’t change the appearance of the concrete — it looks exactly the same after sealing. Best for: Driveways, walkways, and outdoor surfaces where you want invisible protection and a natural look.
| Pros | Cons |
|---|---|
| Invisible — no color change, no sheen | Won’t enhance color or add gloss |
| Long-lasting (5–10 years) | More expensive per gallon |
| Breathable — allows water vapor to escape | Not ideal for smooth, power-troweled surfaces without etching |
| Excellent freeze-thaw protection | Doesn’t protect against oil stains as well as film-formers |
| Non-slip (no surface film) |
Film-Forming Sealers (Acrylic, Epoxy, Polyurethane)
These sealers create a protective film on the surface of the concrete. They’re available in glossy, semi-gloss, and matte finishes and can enhance or darken the concrete’s color (known as a “wet look”). Film-forming sealers are the go-to choice for decorative concrete, stamped patios, and garage floors.
| Pros | Cons |
|---|---|
| Enhances color and adds sheen | Needs reapplication every 1–5 years |
| Excellent stain protection | Can make surface slippery when wet |
| Available in water-based and solvent-based formulas | Surface film can wear off in high-traffic areas |
| Quick and easy to apply | May trap moisture if applied to damp concrete |
| Affordable | Can yellow or haze over time (solvent-based) |
Acrylic Sealers (Most Common DIY Choice)
Acrylic sealers are the most popular film-forming option for DIYers because they’re easy to apply, dry fast, and are affordable. Available in water-based (low odor, easy cleanup) and solvent-based (more durable, higher gloss, stronger odor).
| Acrylic Type | Best For | Reapplication |
|---|---|---|
| Water-based acrylic | Stamped concrete, patios, decorative surfaces | Every 2–3 years |
| Solvent-based acrylic | Driveways, high-traffic areas, wet-look finish | Every 2–4 years |
Epoxy and Polyurethane Sealers
These are heavy-duty film-forming sealers used primarily for interior concrete like garage floors and basements. They create a thick, durable coating that resists chemicals, hot tire pickup, and abrasion. They’re more complex to apply and typically not used outdoors. Best for: Garage floors, workshops, interior concrete. Reapplication: Every 5–10 years. DIY difficulty: Moderate to Advanced — Proper mixing and application require care.
Quick Decision Guide
| Surface | Recommended Sealer | Why |
|---|---|---|
| Driveway (plain concrete) | Penetrating silane/siloxane | Invisible, long-lasting, non-slip |
| Driveway (colored/stamped) | Solvent-based acrylic | Enhances color, adds protection |
| Patio (stamped/colored) | Acrylic (water or solvent-based) | Wet-look or natural, easy to apply |
| Walkway | Penetrating silane/siloxane | Non-slip, durable, invisible |
| Garage floor | Epoxy or polyurethane | Chemical and abrasion resistance |
| Foundation walls | Silane/siloxane | Waterproof, breathable |
Step 1: Surface Preparation
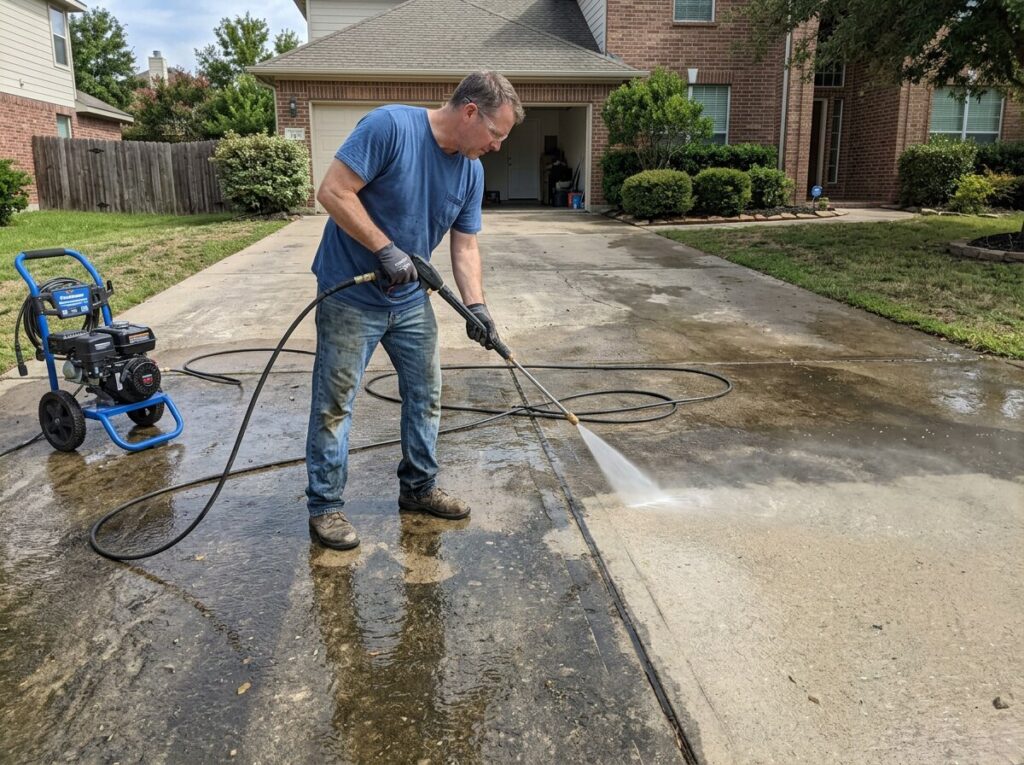
Surface preparation is the most important step in the entire process. A sealer applied to dirty, stained, or contaminated concrete will fail — it won’t adhere properly and will peel or flake off within months.
Clean the Surface Thoroughly
- Remove all items — Sweep away furniture, toys, planters, and debris.
- Treat oil and grease stains — Apply a concrete degreaser or TSP solution to stains and scrub with a stiff-bristle brush. Let it sit for 10–15 minutes, then rinse. For stubborn stains, use a poultice made of degreaser and kitty litter.
- Pressure wash the entire surface — Use a pressure washer at 2,500–3,500 PSI with a 25-degree nozzle tip. Hold the wand 8–12 inches from the surface and work in overlapping passes. The goal is to remove all dirt, mildew, loose material, and residue.
- Scrub stubborn areas — Use a stiff broom and concrete cleaner for areas the pressure washer doesn’t fully clean.
- Remove old sealer — If the concrete was previously sealed and the old sealer is peeling or flaking, you must strip it before applying new sealer. Use a chemical concrete sealer stripper and a floor scraper.
Etch the Surface (If Needed)
Smooth, power-troweled concrete (common on garage floors and some patios) is too smooth for sealers to adhere properly. You need to etch (slightly roughen) the surface to open the pores.
Apply a concrete etching solution (usually a muriatic acid or safer phosphoric acid alternative) according to the manufacturer’s instructions. Scrub it in with a stiff broom, let it react for the recommended time (usually 5–10 minutes), and rinse thoroughly with plenty of water. The surface should feel like fine sandpaper when properly etched.
Safety: Always wear chemical-resistant gloves, safety glasses, and a respirator when using acid-based etching solutions. Add acid to water (never water to acid) if mixing from concentrate. Work in a well-ventilated area.
Let the Concrete Dry Completely
This is critical. Sealer applied to damp concrete will trap moisture, causing clouding, bubbling, and peeling. After cleaning and etching, allow the concrete to dry for at least 24–48 hours in warm, dry weather. Test by taping a clear plastic square (about 12×12 inches) to the concrete and checking after 4 hours — if condensation appears under the plastic, the concrete is still too wet to seal.
Climate tip: In humid climates (Southeast, Gulf Coast), drying can take 48–72 hours. In arid climates (Southwest), 24 hours is often sufficient. Avoid sealing during or right before rain.
Step 2: Mask and Protect Adjacent Surfaces
Use painter’s tape and drop cloths to protect walls, siding, landscaping, and adjacent surfaces that you don’t want sealer on. This is especially important when using a sprayer — overspray can travel farther than you expect. Cover nearby plants with drop cloths, as some sealers (especially solvent-based) can damage foliage. Remove or cover vehicles in the garage or driveway.
Step 3: Apply the Sealer
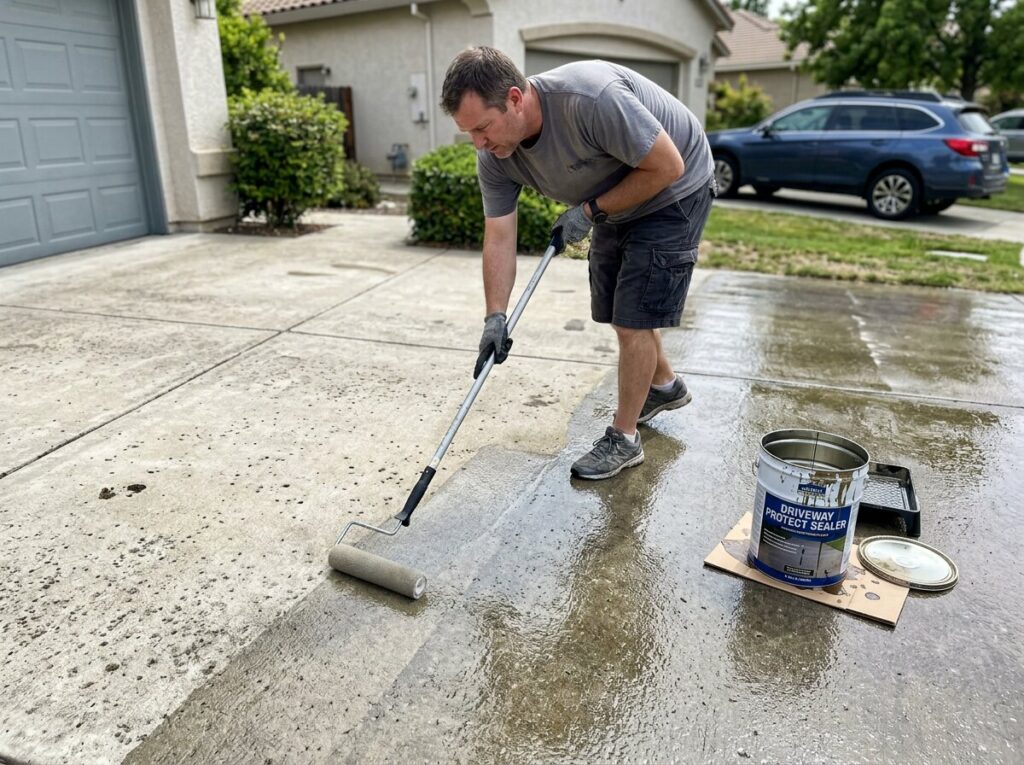
Application Methods Compared
| Method | Best For | Pros | Cons |
|---|---|---|---|
| Pump sprayer | Large flat surfaces (driveways, patios) | Fast, even coverage, gets into textures | Overspray risk; must clean sprayer thoroughly |
| Paint roller (3/8-inch nap) | Small areas, edges, smooth surfaces | Controlled application, no overspray | Slower; can leave roller marks |
| Airless sprayer | Large professional jobs | Most even, fastest | Expensive equipment; overspray |
For most DIY projects, a pump sprayer for the main area and a roller for edges and detail work is the ideal combination.
How to Apply
- Read the manufacturer’s instructions — Every sealer is different. Follow the coverage rate (usually 200–400 sq. ft. per gallon), drying time, and number of coats recommended.
- Start at the farthest corner and work toward your exit — don’t paint yourself into a corner!
- Apply a thin, even coat — Don’t over-apply. Pooling or puddling leads to cloudy, uneven curing. If using a sprayer, use a back-and-forth motion with overlapping passes. If rolling, use a W pattern and maintain a wet edge to avoid lap marks.
- Wait for the first coat to dry — Usually 1–4 hours for water-based, 2–6 hours for solvent-based (check the label).
- Apply a second coat — Most sealers benefit from a second thin coat applied perpendicular (at 90 degrees) to the first for maximum coverage and uniformity.
Solvent-Based vs Water-Based Application Notes
- Water-based sealers are thinner and easier to apply. They’re low-odor, clean up with soap and water, and are safe to use indoors and in enclosed spaces. However, they generally provide a thinner film and less gloss.
- Solvent-based sealers are more durable, produce a higher gloss, and penetrate better. They have strong fumes — use them only outdoors or in very well-ventilated areas, and wear a respirator. Cleanup requires mineral spirits or xylene.
Step 4: Drying and Curing
After application, the sealer needs time to dry to the touch and cure to full hardness. These are different:
- Dry time — When the surface is no longer tacky. Typically 1–6 hours. You can walk on it at this point.
- Cure time — When the sealer reaches full strength and chemical resistance. Typically 24–72 hours. Wait this long before driving on a sealed driveway or placing furniture on a sealed patio.
Avoid water contact during curing. Rain on a freshly sealed surface can cause clouding, whitening, and peeling. Check the forecast and plan for at least 24 hours of dry weather after application.
Troubleshooting Common Problems
| Problem | Cause | Solution |
|---|---|---|
| Cloudy/hazy finish | Applied to damp concrete or high humidity | Strip and reapply in dry conditions |
| Bubbling/blistering | Trapped moisture or applied too thick | Strip affected area and reapply thinly |
| Peeling/flaking | Poor surface prep or old sealer underneath | Strip fully, etch, and reapply |
| Uneven sheen | Uneven application or lap marks | Apply a thin second coat to even out |
| Slippery when wet | Film-forming sealer on smooth surface | Add anti-slip additive to the sealer |
Step 5: Reapplication Schedule
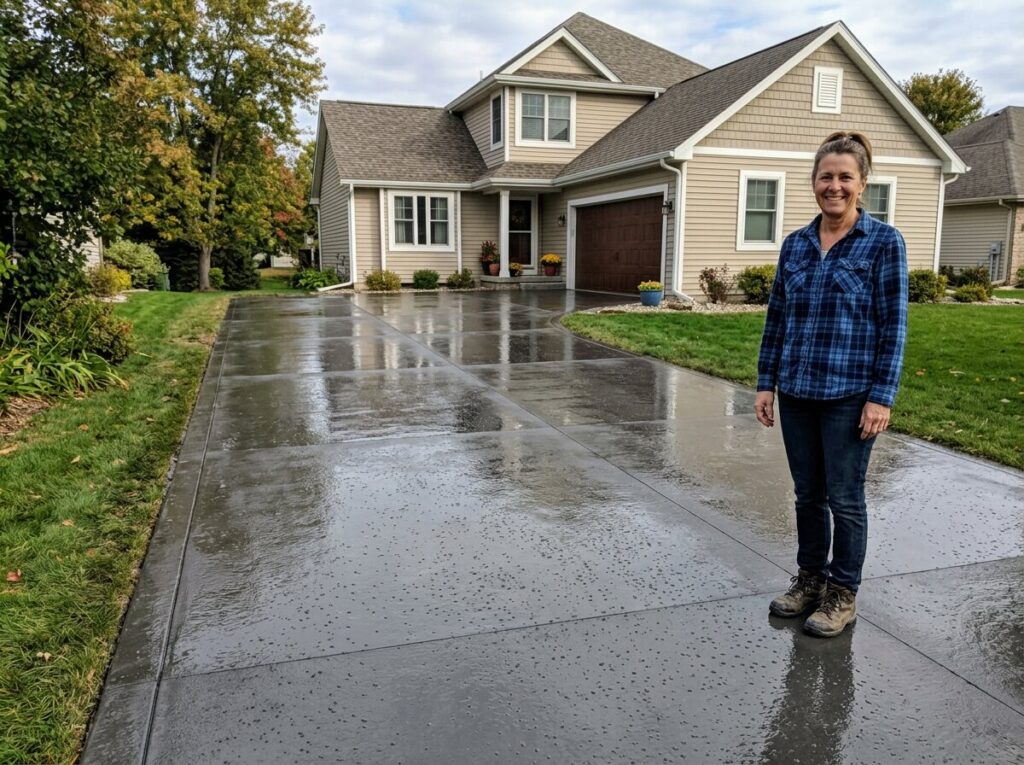
Sealers don’t last forever. Here’s when to reseal:
| Sealer Type | Reapplication Frequency | Signs It’s Time |
|---|---|---|
| Penetrating silane/siloxane | Every 5–10 years | Water no longer beads on the surface |
| Water-based acrylic | Every 2–3 years | Sheen fades, surface darkens when wet (water absorbing) |
| Solvent-based acrylic | Every 2–4 years | Color enhancement fades, surface looks dull |
| Epoxy (garage floor) | Every 5–10 years | Surface shows wear, hot tire marks appear |
Simple test: Sprinkle a few drops of water on your sealed concrete. If the water beads up and sits on the surface, the sealer is still working. If it soaks in and darkens the concrete, it’s time to reseal.
Climate and Geographic Considerations
| Climate Zone | Sealer Recommendation | Timing |
|---|---|---|
| Cold / Freeze-Thaw (Northeast, Midwest, Mountain West) | Penetrating silane/siloxane for driveways; solvent acrylic for patios | Seal in late spring or early fall — avoid peak summer heat |
| Hot / Dry (Southwest) | Acrylic with UV inhibitors | Apply in early morning to avoid rapid drying; avoid application above 90°F |
| Wet / Humid (Southeast, Gulf Coast) | Penetrating sealer (breathable); avoid film-formers on shaded areas prone to moisture | Allow extra drying time; seal in dry season (spring/fall) |
| Coastal / Salt Air | Silane/siloxane (salt-resistant, breathable) | Reseal every 3–5 years due to salt exposure |
Temperature guidelines: Most sealers should be applied when the surface temperature is between 50°F and 90°F. Avoid applying in direct, intense sunlight (causes rapid drying and poor penetration) or when temperatures will drop below 50°F within 24 hours (prevents proper curing).
When to Call a Pro
DIY concrete sealing is straightforward, but consider hiring a professional when:
- The surface is very large (over 1,000 sq. ft.) — Equipment and time become significant.
- Old sealer needs stripping — Chemical stripping is messy and labor-intensive; pros have the right equipment.
- The concrete is severely damaged — If your concrete has deep cracks, major spalling, or structural issues, sealing won’t fix underlying problems. A pro can assess whether repair or replacement is needed first.
- Decorative or stamped concrete — While still DIY-able, decorative concrete sealers require careful application to avoid streaks, bubbles, and uneven sheen. A pro ensures a flawless finish.
- Epoxy garage floor coating — Proper surface prep (grinding or acid etching) and epoxy mixing require skill and specialized equipment for a durable result.
Not feeling confident? Local partners can complete this job quickly and professionally. Find a Local Pro.
Conclusion
Sealing your concrete is one of the simplest, most affordable DIY tasks that pays dividends for years. By choosing the right sealer — penetrating for invisible, long-lasting protection or film-forming for color-enhancing beauty — and taking the time to prep the surface properly, you’ll protect your concrete from water, salt, stains, and UV damage. Remember: the quality of your result depends 80% on surface preparation and 20% on the sealer itself. Clean thoroughly, etch if needed, apply on a dry day within the right temperature range, and reseal on schedule. Your concrete will thank you with decades of service and good looks.
Leave a Reply