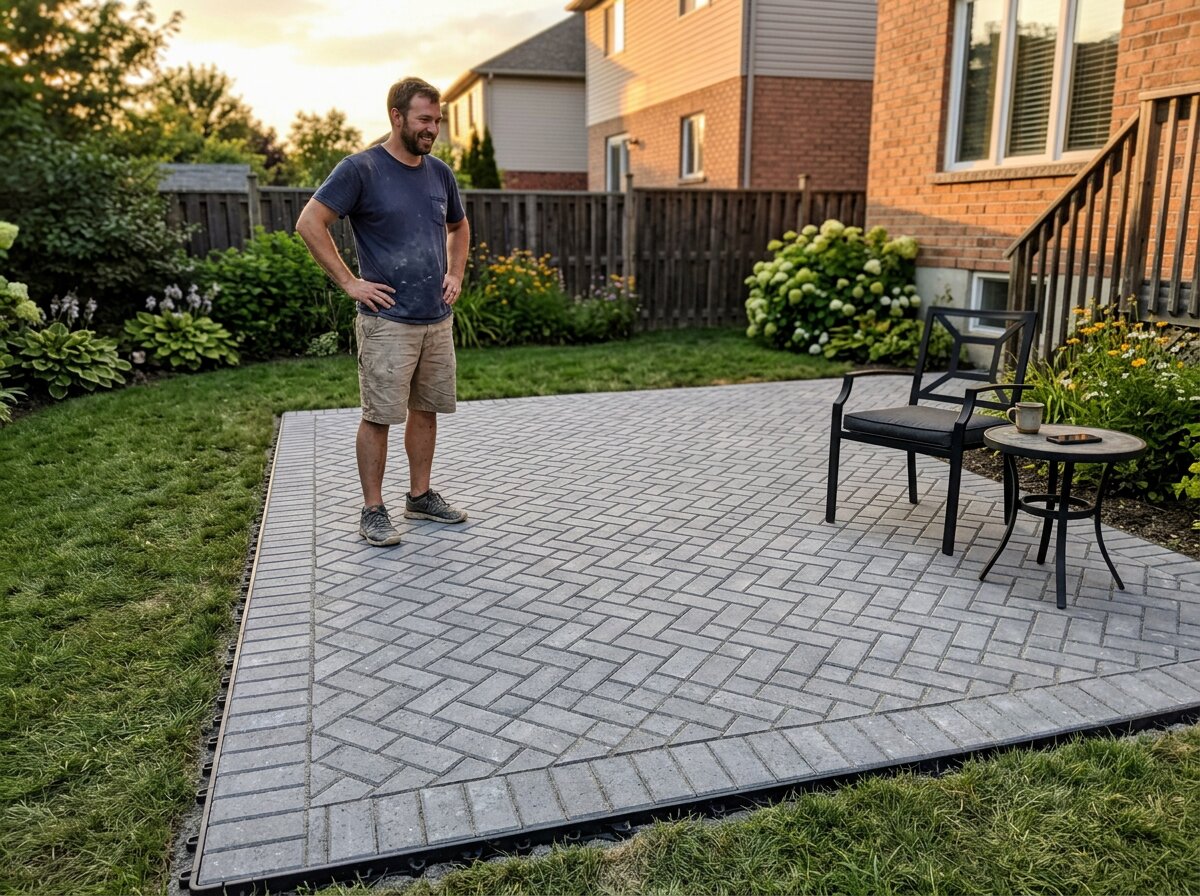
A paver patio transforms a boring patch of yard into an outdoor living room — a place to grill, gather, and unwind. Pavers are one of the most popular DIY hardscape materials because they are durable, available in endless colors and patterns, and relatively forgiving to install. Unlike poured concrete, pavers flex with ground movement and can be lifted and reset if one ever cracks or settles. Learning how to install pavers yourself can save $5–$15 per square foot in labor, and the result looks every bit as professional as a contractor’s work when done correctly. In this step-by-step guide, we cover the full process from excavation and base preparation through laying, cutting, and sealing your pavers for a patio that lasts decades.
Materials & Tools Needed
A great patio starts with the right base. Do not skimp on the layers below the pavers — they are what prevent settling and weeds.
Materials
- Pavers of your choice (concrete, brick, or natural stone like flagstone)
- Crushed gravel (3/4-inch minus or road base) — 4–6 inches deep
- Paver base sand or bedding sand — 1 inch deep
- Polymeric sand (e.g., Techniseal polymeric jointing sand) for the joints
- Landscape fabric (woven or non-woven weed barrier)
- Paver edging (plastic restraint with spikes)
- Paver sealer (optional but recommended)
Tools
- Plate compactor (rent one — a Wacker Neuson plate compactor is a solid choice)
- Rubber mallet
- Level (a long 4-foot level or a screed board)
- Screed rails (1-inch PVC pipe or metal electrical conduit)
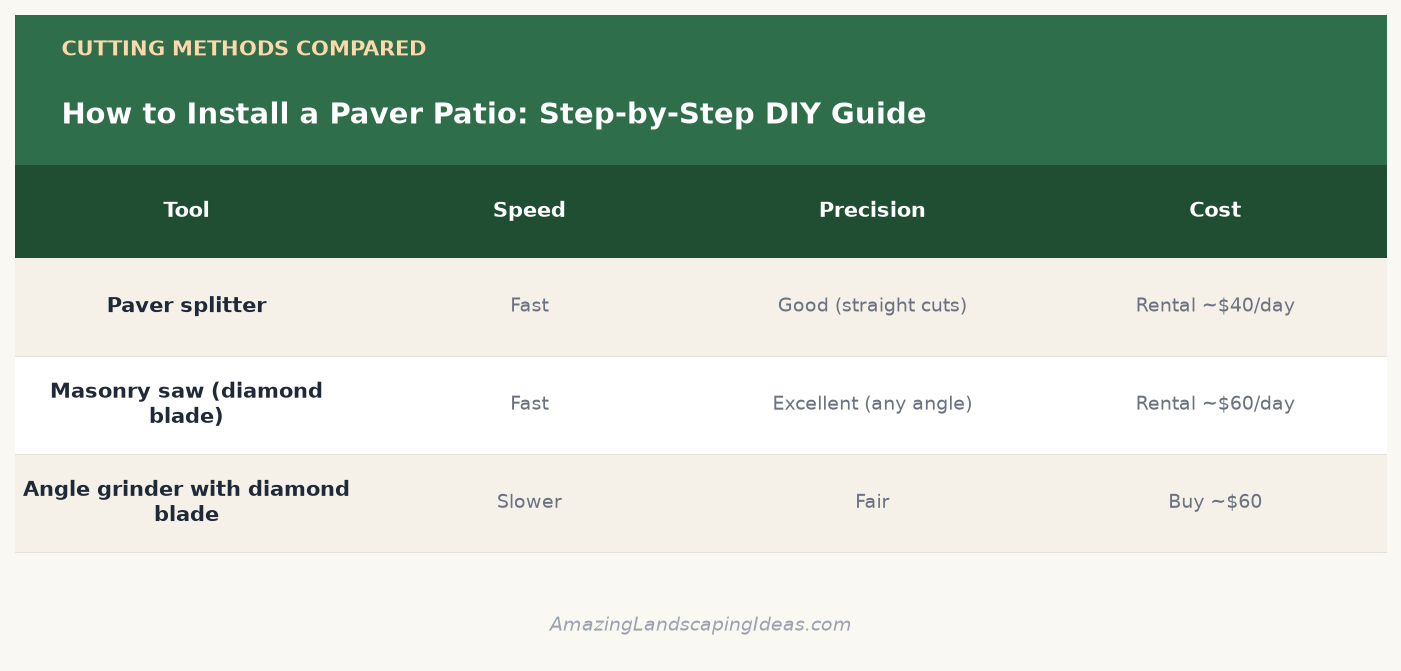
- Paver splitter or masonry saw with a diamond blade
- Shovel, rake, and wheelbarrow
- Push broom
- Garden hose with spray nozzle
- Tape measure and stakes with string line
- Knee pads and heavy-duty work gloves
Step 1: Planning and Marking the Patio Area
Design and Layout
- Choose your size and shape. A standard entertaining patio is 12×12 feet (144 sq ft), but 16×20 feet gives you room for a table, chairs, and a grill. Rectangles are easiest for beginners; curves add beauty but require more cutting.
- Mark the outline. Drive stakes at each corner and stretch mason line between them. For curves, lay a garden hose along the desired edge and trace it with marking paint.
- Call 811 before any excavation to have underground utilities marked.
- Check the slope. Your patio must slope away from your house at a rate of about 1 inch per 4 feet (roughly a 2% grade) to direct rainwater away from the foundation.
Climate tip: In the cold Northeast and Midwest, frost heave is your biggest enemy. Excavate deeper — 8–10 inches total for the base — and use a geotextile fabric between the subsoil and gravel to prevent the base from migrating. In the dry Southwest, a 4-inch base is usually adequate, but use polymeric sand to lock joints against wind erosion. In the wet Southeast, prioritize drainage by increasing the slope and using a non-woven landscape fabric that allows water to pass through.
Step 2: Excavation
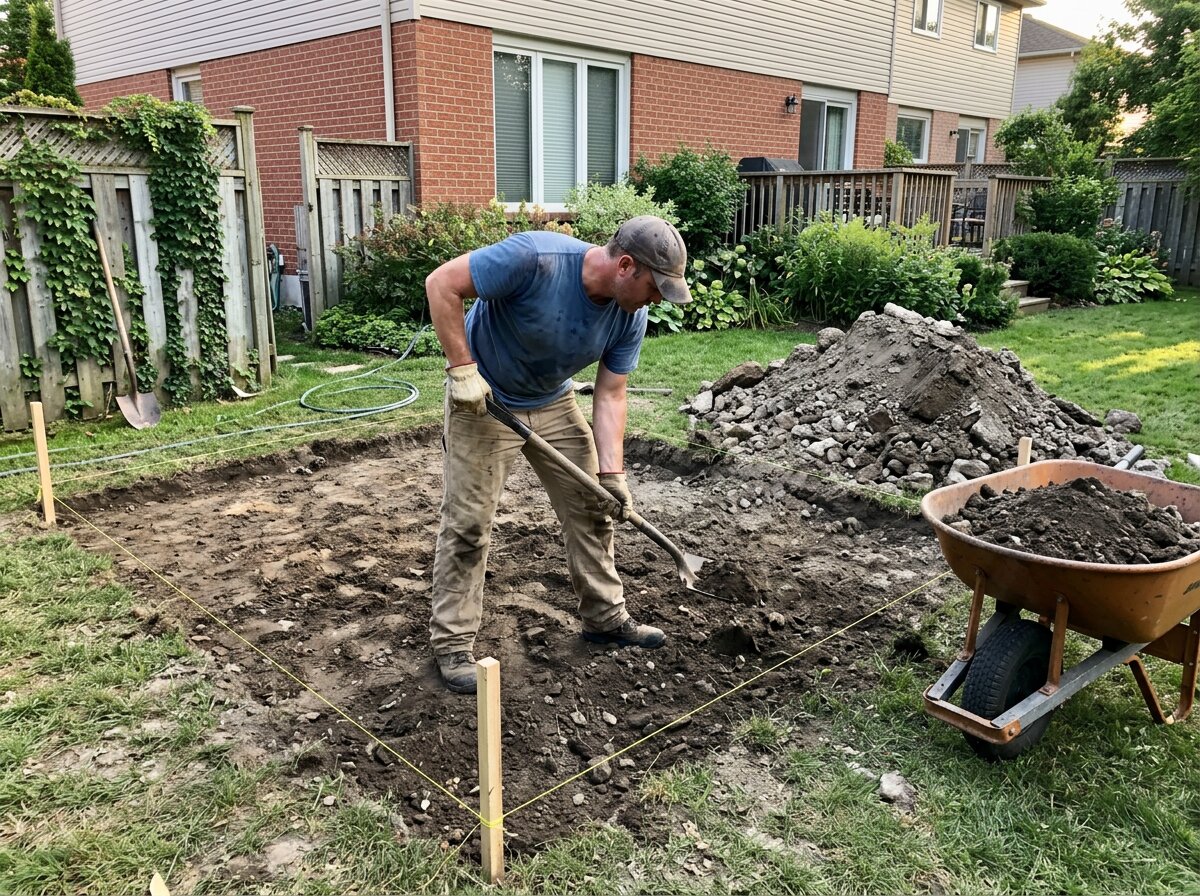
This is the sweat-equity phase. The total depth you need to dig equals the paver thickness plus the bedding sand (1 inch) plus the gravel base (4–6 inches). For a standard 2-inch concrete paver on a 4-inch base, that is about 7.5 inches total.
- Remove the sod and topsoil with a flat shovel or a rented sod cutter.
- Excavate to your calculated depth, extending 6 inches beyond the finished patio footprint on all sides to give the paver edging something to bite into.
- Use a long level or a screed board to check that the bottom is flat and follows your slope.
- Rake the subsoil smooth and compact it with a hand tamper or the plate compactor.
Step 3: Base Preparation
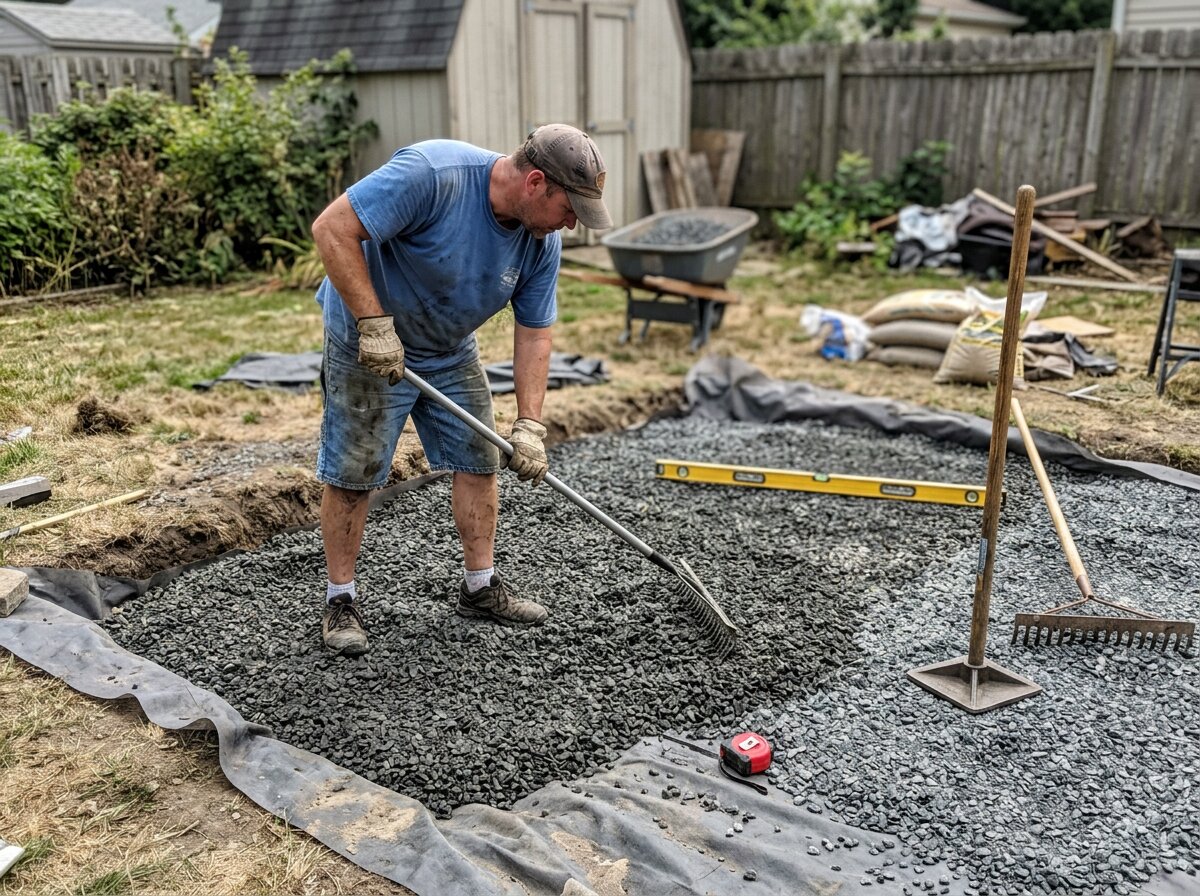
The gravel base is the structural foundation of your patio. Get this right and the rest is easy.
- Lay landscape fabric over the excavated subsoil, overlapping edges by 6 inches. This prevents weeds and keeps the gravel from sinking into soft soil.
- Spread the crushed gravel in 2-inch lifts (layers). Do not dump the entire 6 inches at once — compacting in thinner layers yields a firmer base.
- Compact each layer with the plate compactor. Make 2–3 passes in different directions until the surface is firm and you no longer leave footprints. A properly compacted base should feel as hard as a driveway.
- Check for flatness and slope with a long screed board or level. Add or remove gravel as needed, then re-compact.
- Install the bedding sand layer. Place two screed rails on the gravel about 4–6 feet apart. Pour bedding sand between them and drag a straight 2×4 across the rails to create a perfectly smooth 1-inch sand layer. Remove the rails, fill the voids with sand, and trowel smooth. Do not walk on the screeded sand.
Step 4: Laying the Pavers
Now the fun part — your patio starts to take shape.
1. Choose a pattern. Popular beginner-friendly patterns include:
- Running bond (brick pattern): Offset rows; hides minor imperfections. Easy difficulty, good structural strength — best for patios and walkways.
- Herringbone: Eye-catching and very stable for high-traffic or driveways. Medium difficulty, excellent structural strength — best for driveways and high-traffic areas.
- Stack bond: Simple grid, modern look but less structural interlock. Easy difficulty, fair structural strength — best for accent areas and low-traffic zones.
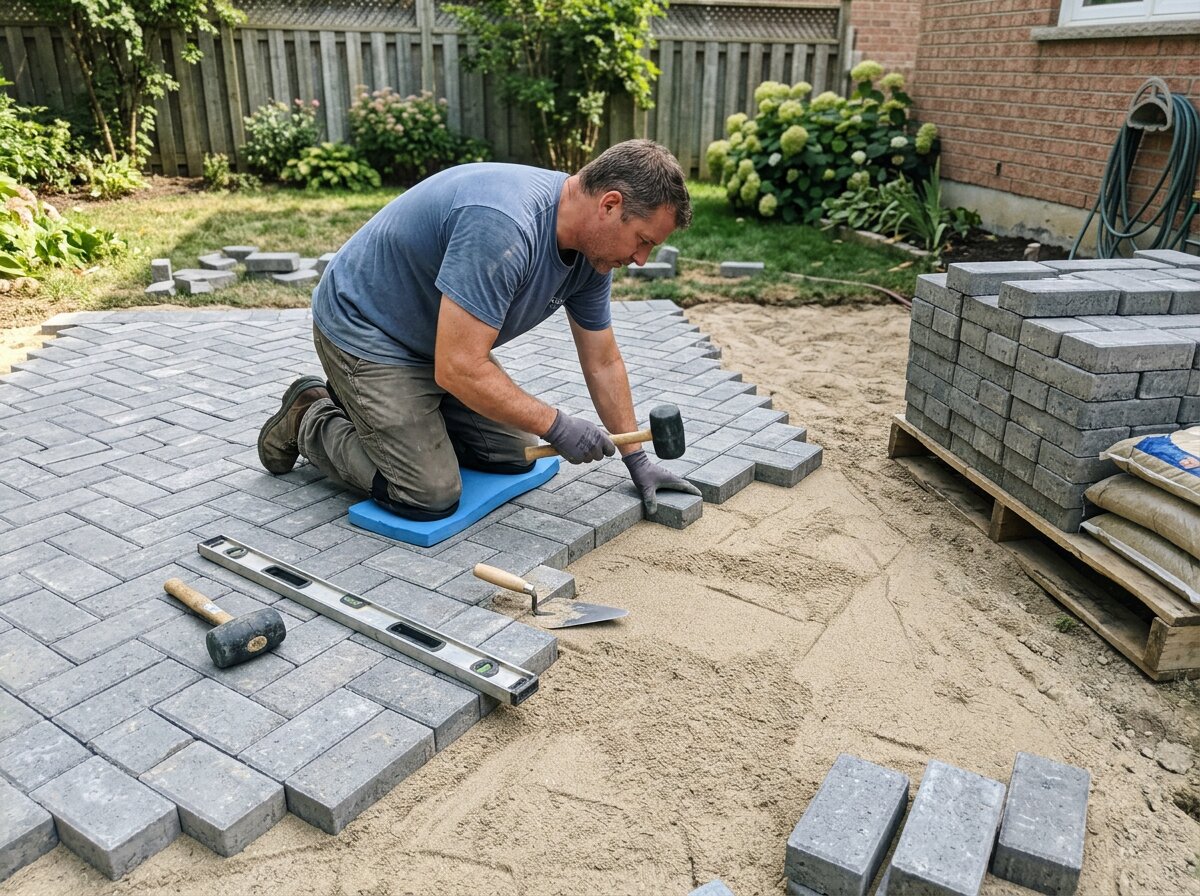
- Start in a corner (typically a square corner against the house or a fixed edge). Lay pavers gently onto the sand — do not press or slide them.
- Keep gaps tight. Most concrete pavers have built-in spacer nubs that create a uniform 1/16- to 1/8-inch joint. If yours do not, use a small spacer or just butt them snugly.
- Check alignment frequently. Every few rows, stretch a string line across the pavers to ensure rows stay straight. Adjust by nudging pavers with the rubber mallet.
- Cut pavers as needed (see next section) when you reach edges, corners, or obstacles.
Step 5: Cutting Pavers
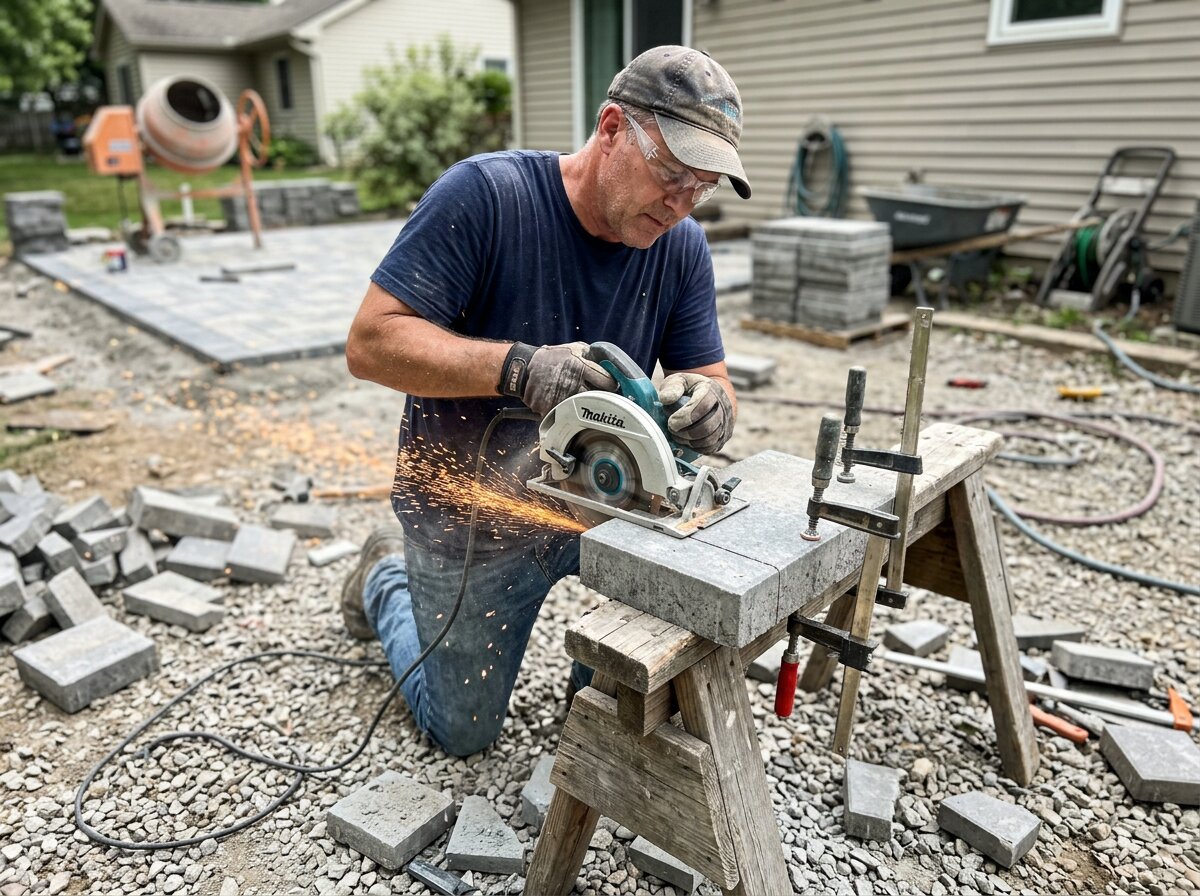
You will inevitably need to cut pavers to fill in edges and around corners, posts, or steps.
Cutting Methods Compared
- Measure the gap and mark the cut line on the paver with a pencil or chalk.
- Score the line lightly first, then make your full cut.
- Always wear safety glasses and a dust mask — cutting concrete pavers produces fine silica dust. Wet-cutting saws eliminate dust but require a water source.
Pro tip: Mark and cut all your edge pieces at once at the end, rather than stopping to cut each one as you go. It keeps your momentum up and reduces saw setup time.
Step 6: Installing Edging and Compacting
- Install plastic paver edging along all exposed edges. The edging has spikes that get driven into the gravel base to hold the pavers rigidly in place. Secure it to the pavers with the manufacturer’s clips.
- Run the plate compactor over the entire patio. This sets the pavers into the sand and forces sand up into the joints. Make 2–3 passes. Do not skip this step — it locks the surface and prevents future movement.
Note: If you have natural stone pavers with textured or uneven tops, place a rubber mat or a layer of landscape fabric over them before compacting to avoid chipping.
Step 7: Applying Polymeric Sand and Sealing
Sweeping in Polymeric Sand
Polymeric sand contains fine sand plus a polymer binder that hardens when wet, locking pavers in place and preventing weeds and ant colonies.
- Ensure the patio and joints are bone dry. Even slight moisture will activate the polymer prematurely and cause staining.
- Sweep the sand into the joints with a push broom, working diagonally across the pavers. Fill joints until they are full.
- Compact again to settle the sand deeper, then add more sand and repeat until joints remain full.
- Sweep off all excess from the paver surface — any sand left on the face will bond and leave a white haze.
- Mist with water. Use a gentle fan spray to activate the polymer. Wet the surface, let it soak in, and repeat 3–4 times until the water no longer bubbles in the joints. The sand sets hard within 24–48 hours.
Sealing (Optional but Recommended)
A paver sealer enriches the color, repels stains, and stabilizes the joint sand. Apply with a pump sprayer or roller 60 days after installation — the pavers need to fully cure and dry out first. Reapply every 2–3 years.
Climate tip: In the Southwest, UV exposure fades concrete pavers quickly — a UV-resistant sealer is worth the investment. In the Northeast and Midwest, freeze-thaw cycles can heave improperly drained patios; ensure your base drains well and re-seal every 2 years to keep moisture out of the paver surface. In the humid Southeast, choose a breathable, film-forming sealer that resists mildew and algae growth.
When to Call a Pro
A DIY paver patio is very achievable, but consider hiring a contractor if:
- You are building on a steep slope that requires retaining walls or terracing.
- The patio is large (500+ sq ft) or has complex curves, inlays, or multiple levels.
- You discover poor drainage or a high water table — standing water under a patio will destroy even the best base over time. A pro can install French drains or adjust the grade.
- You want natural stone like flagstone or travertine. Irregular thicknesses require a mortar-set installation that is beyond most DIYers’ comfort level.
Not feeling confident? Local partners can complete this job quickly and professionally.
Conclusion
Installing a paver patio is a deeply satisfying project that rewards careful base preparation and attention to detail. The secret to a patio that stays flat and crack-free for decades is not the pavers themselves — it is the compacted gravel base and the screeded sand layer beneath them. Take your time excavating and compacting, choose the right pattern and materials for your climate, and finish with polymeric sand and a good sealer. Step back and enjoy a beautiful outdoor living space you built yourself, ready to host countless summer barbecues and quiet evenings under the stars.
Leave a Reply