Installing a privacy fence is one of the most rewarding weekend warrior projects you can tackle around your home. A well-built privacy fence instantly boosts curb appeal, defines your property lines, keeps pets and kids safe, and creates a secluded backyard retreat—all while adding tangible value to your property. Whether you want to block a nosy neighbor’s view, reduce street noise, or simply frame a garden, learning how to install a privacy fence yourself can save you thousands of dollars compared to hiring a fencing crew. The average DIY privacy fence runs $12–$25 per linear foot in materials, while professional installation can easily double or triple that figure.
In this complete DIY guide, we walk through every step: planning and layout, digging post holes, setting posts in concrete, attaching rails and pickets, and hanging a gate. With the right tools, a helping hand for the heavy lifting, and a little patience, you can have a beautiful, long-lasting privacy fence standing proud by the end of the weekend. If you are also refreshing the rest of your yard, our guide to pool landscaping ideas for plants, hardscaping, and privacy pairs perfectly with a new fence.
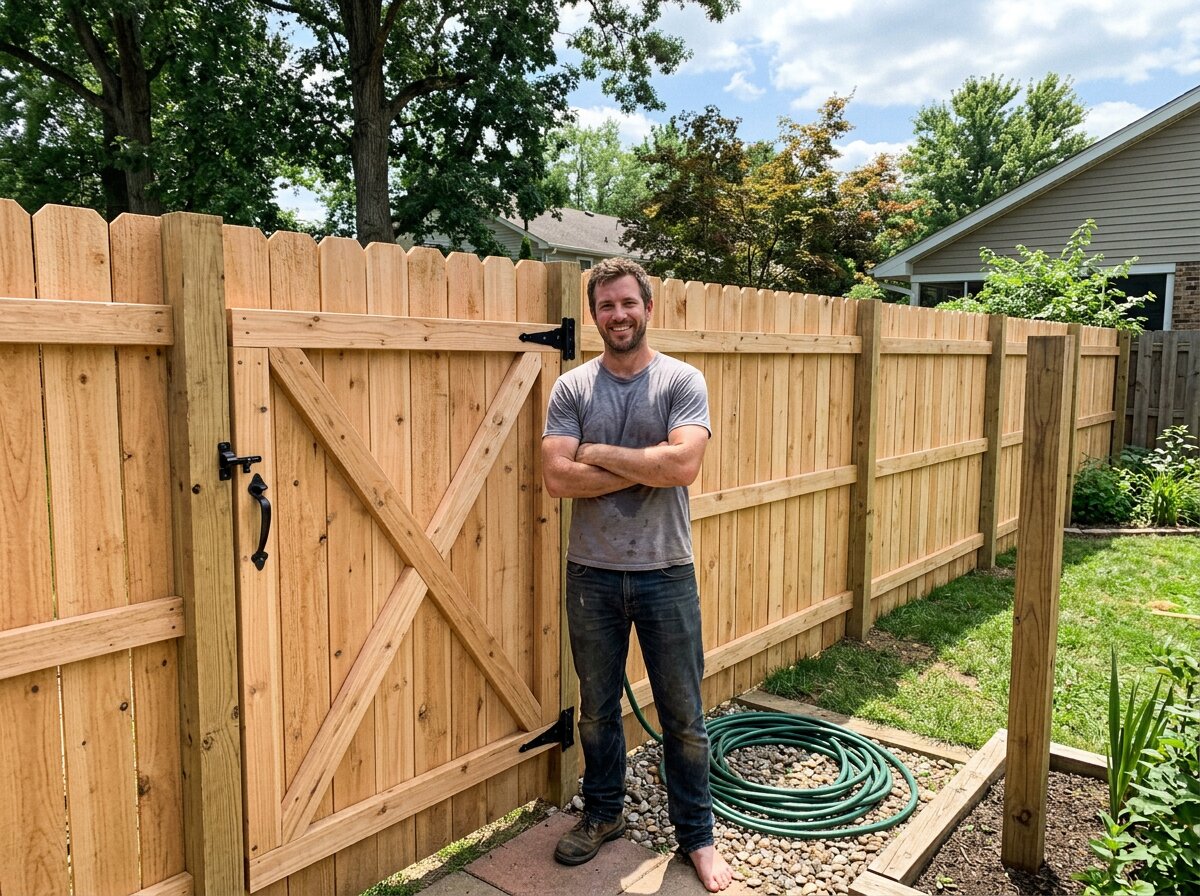
Step-by-Step Overview

Materials & Tools Needed
Before breaking ground, gather everything you need. Having your materials staged on-site keeps the project moving and prevents mid-weekend runs to the home center.
Materials
- Pre-built fence panels or individual pickets (cedar, pressure-treated pine, or vinyl)
- 4×4 pressure-treated fence posts (8 ft or 10 ft, depending on panel height)
- 2×4 rails if building panels from scratch
- Quikrete fast-setting concrete mix (one 50 lb bag per post)
- Galvanized fence post nails or exterior screws
- Gate hardware (hinges and latch)
- Gravel for post drainage
- Wood stain or sealer
- Spray paint or stakes and mason line for layout
Tools
- Post hole digger or two-man auger
- Level (a post level or a 24-inch spirit level)
- Tape measure
- Circular saw or miter saw
- Cordless drill / impact driver
- Sledgehammer
- Wheelbarrow and mixing tub for concrete
- Safety glasses and heavy-duty work gloves
- Shovel and digging bar
- String line and line level
- Clamps
Step 1: Planning, Layout, and Permits
Check Property Lines and Local Codes
Before you dig a single hole, call 811 (the national Call Before You Dig hotline) to have underground utilities marked—it is free and legally required in most areas. You can schedule a locate request online through the official Call 811 website. Next, confirm your property lines. A survey plat or a visit to your county assessor’s GIS map can help; when in doubt, build a few inches inside the line to avoid disputes with neighbors.
Check your local zoning office for fence height restrictions, setback rules, and permit requirements. Many municipalities cap backyard fences at 6 feet and front-yard fences at 4 feet, and some HOAs dictate style and color. Pulling a permit usually costs $30–$75 and takes a day or two.
Marking the Fence Line
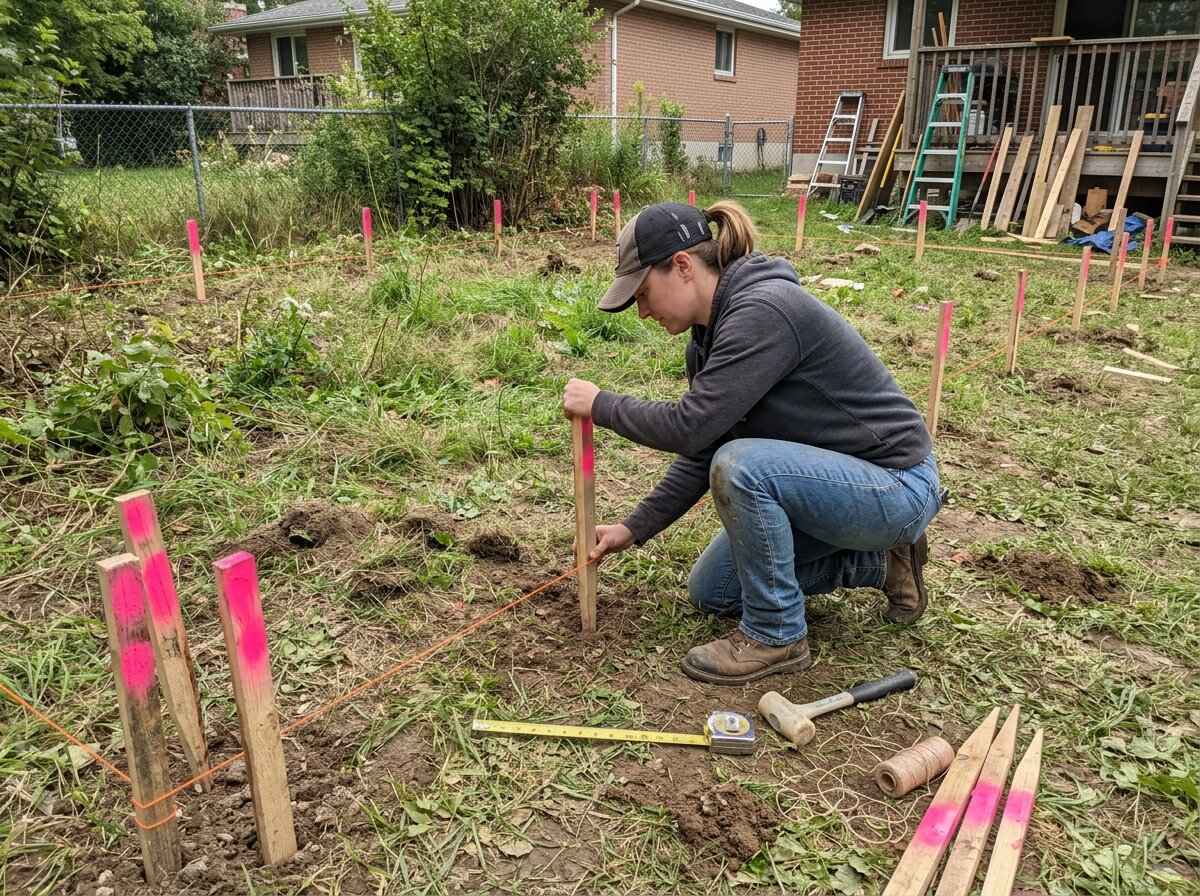
- Drive a stake at each corner of the planned fence run.
- Stretch mason line tightly between stakes, using a line level to keep it perfectly horizontal.
- Mark each post location along the line. Standard spacing is 8 feet on center for pre-built panels, or 6–8 feet if you are attaching individual pickets. Measure carefully—consistent spacing is what makes a fence look professional.
Climate tip: In the Northeast and Midwest, where freeze-thaw cycles heave the soil, set your posts at least 36 inches deep—below the frost line—to prevent the fence from tilting after the first winter. In the Southeast and Gulf Coast, 24–30 inches is usually sufficient, but add extra concrete below the post for wind resistance during hurricane season. In the Southwest, watch for rocky caliche soil—you may need a power auger or even a rented jackhammer.
Step 2: Digging Post Holes
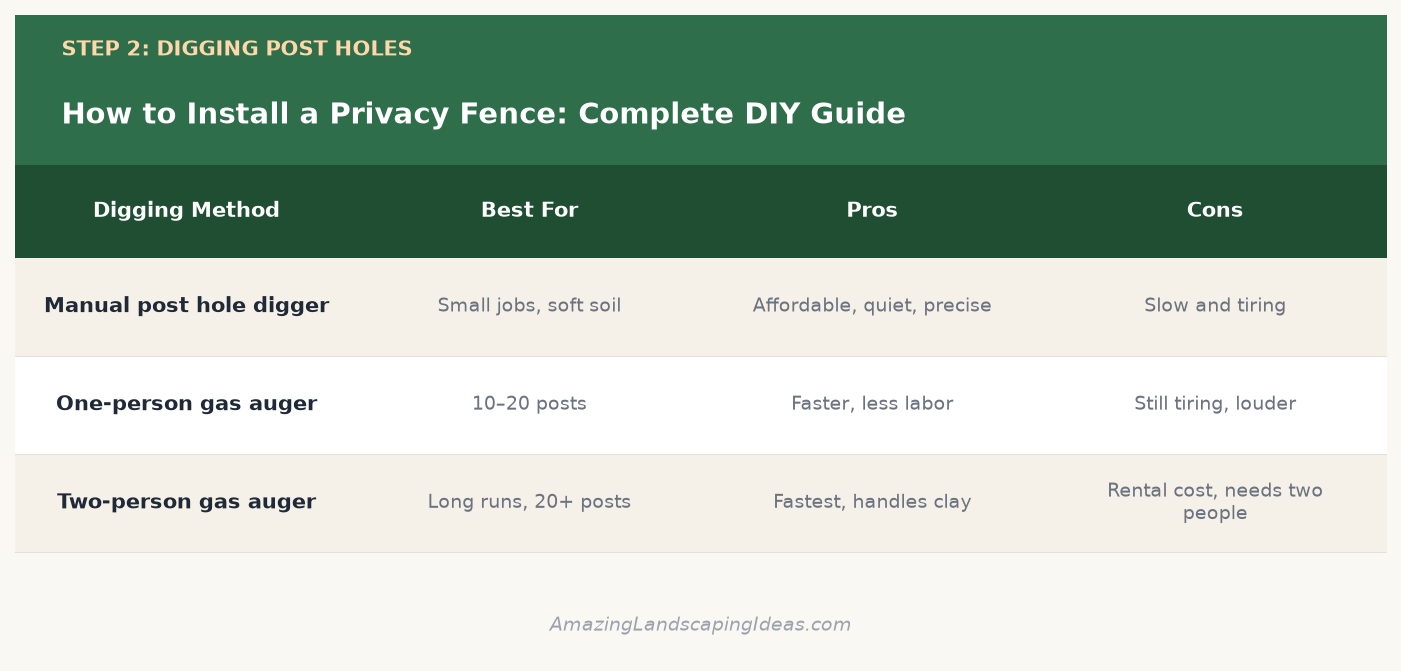
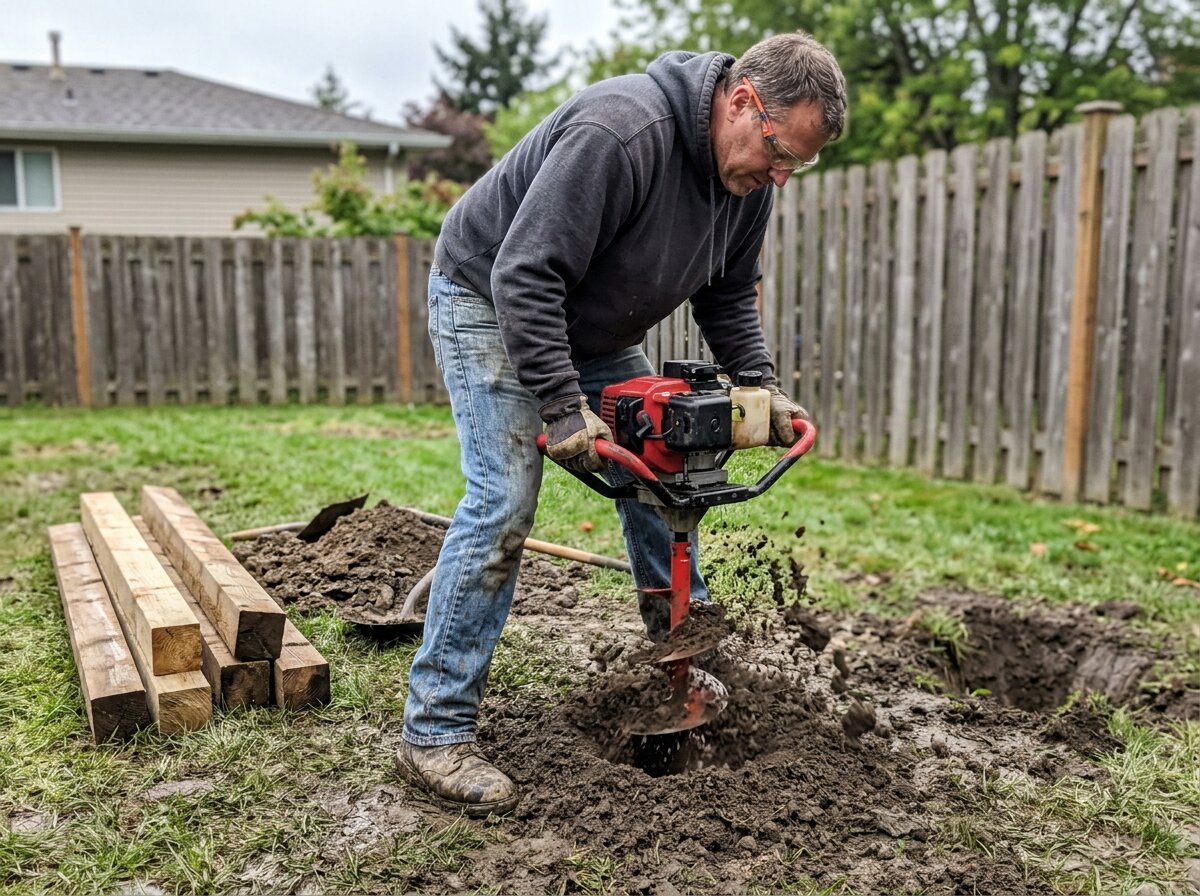
This is the hardest physical work of the project, so pace yourself and enlist a friend. Using your post hole digger or a rented two-person gas auger for larger jobs, dig holes at each marked location. Aim for holes that are three times the width of the post (about 10–12 inches across for a 4×4) and deep enough to bury one-third of the total post length plus 6 inches for a gravel drainage base.
Pro tip: If you hit a large root or rock, use a digging bar (a heavy steel pry bar) to break it up rather than trying to force the digger through. Keep a bucket nearby to collect the excavated soil—you will not be reusing it for backfill.
Step 3: Setting Posts in Concrete
Properly set posts are the backbone of a fence that stands straight for decades. Take your time here.
- Add a gravel base. Pour 4–6 inches of crushed gravel into each hole and tamp it down. This improves drainage and prevents the wooden post from sitting in pooled water that causes rot.
- Place the post. Drop the 4×4 into the hole. Use your level to plumb it in both directions (front-to-back and side-to-side). A post level that straps around the post with rubber bands frees both of your hands.
- Brace the post. Temporarily brace each post with 2×4 stakes screwed to the post at a 45-degree angle. This holds it perfectly plumb while the concrete cures.
- Pour the concrete. We recommend Quikrete fast-setting concrete mix because it sets in about 20–40 minutes and reaches structural strength in four hours. Pour the dry mix into the hole around the post, then add water with a hose—or pre-mix it in a wheelbarrow for a smoother pour. Fill until the concrete is a couple of inches below grade so you can cover it with soil and grass later.
- Slope the top of the concrete away from the post so water runs off rather than pooling against the wood.

Climate tip: In the humid Southeast, pressure-treated pine posts are prone to fungal rot. Consider using metal posts with a wood-grain finish or wrapping the buried portion of wooden posts in a bituminous post protector to extend their lifespan from 10–15 years to 25 years. Allow the concrete to cure overnight before attaching panels.
Step 4: Attaching Rails and Pickets
Building from Panels vs. Individual Pickets

Using Pre-Built Panels
- Measure the exact distance between each pair of posts. Panels are typically 8 feet wide, but real-world spacing is rarely exactly 96 inches, so you may need to trim.
- Cut the panel rails to fit using a circular saw.
- Lift the panel into place (two people make this easy) and clamp it to the posts.
- Check for level, then secure the panel to each post with four to six exterior-grade screws.
- Repeat down the line, checking that the tops of all panels align for a clean, continuous look.
Building with Individual Pickets
- Install three horizontal 2×4 rails (top, middle, and bottom) between posts using galvanized rail brackets.
- Start at a corner or end post. Measure from the ground to the desired fence height and mark it.
- Stretch a string line at the top height between posts to keep every picket aligned.
- Nail or screw your first picket flush against the end post. Use a small spacer block to maintain uniform gaps—about 1/8 inch for cedar or a snug butt-joint for pressure-treated pine.
- Work your way along, checking plumb on every third or fourth picket.

Material comparison: Cedar pickets are naturally rot- and insect-resistant and take stain beautifully, but they cost 30–50% more than pressure-treated pine. Vinyl fencing never needs staining and shrugs off moisture, making it ideal for humid Southeast climates, but it can become brittle in extreme cold. Composite fencing offers the look of wood with minimal maintenance and is an excellent—though pricier—choice for any region.
Step 5: Installing a Gate
A functional gate ties the whole fence together and is often the trickiest part for first-timers.
- Install gate posts extra deep. Gate posts carry extra load, so set them a few inches deeper and use extra concrete. Make sure they are perfectly plumb and spaced exactly the gate width plus 1 inch of clearance.
- Hang the gate. Attach heavy-duty gate hinges to the gate post first, then lift the gate into position and screw the hinge rails to the gate frame. Use a block or shim under the gate to hold it at the correct height while you fasten.
- Test swing. The gate should swing freely without dragging. If it sags, add a diagonal brace from the bottom hinge side to the top latch side to prevent racking.
- Install the latch at a comfortable height (around 4 feet for adults, or higher if you want to keep small children from wandering out).
Step 6: Finishing and Maintenance
Once the fence is up, protect your investment:
- Stain or seal the wood within a few weeks of installation. A quality penetrating oil stain (like a semi-transparent cedar-tone stain) repels water and blocks UV damage. Apply a second coat after the first one dries.
- Re-seal every 2–3 years in harsh climates (Northeast, Midwest, Southeast) and every 3–5 years in dry Southwest climates.
- Keep vegetation away. Trim vines and shrubs back so they are not trapping moisture against the boards, which accelerates rot.
- Inspect posts annually for signs of leaning or rot, especially after winter ground heave.
When to Call a Pro
Most DIYers can handle a straight-run privacy fence on flat ground, but some situations call for a professional:
- Sloped or uneven terrain. Stepped or raked fencing on a hill requires careful geometry and custom panel cutting. A pro can make it look seamless.
- Rocky or extremely hard soil. If you spend an hour per post fighting limestone or caliche, a contractor with a hydraulic auger will save your back and your weekend.
- Long runs (200+ linear feet). The time and labor savings of a crew become significant, and bulk material discounts may offset the labor cost.
- Permit and HOA complexity. If your city requires engineered drawings or your HOA mandates a specific fence style, a fencing contractor handles the paperwork and guarantees compliance.
Looking for more weekend upgrades to complement your new fence? Check out our 20 deck ideas to transform your backyard for a coordinated outdoor living space.
Conclusion
Building a privacy fence yourself is one of the highest-impact DIY landscaping projects you can undertake. With careful planning, properly set posts, and quality materials, your fence will stand strong and look great for 15–25 years. Remember to call 811 before you dig, follow local codes, and protect your wood with a good stain. Whether you are enclosing a pool, screening a patio, or just reclaiming your backyard privacy, the sense of accomplishment that comes from stepping back and admiring a privacy fence you built with your own hands is tough to beat.
Leave a Reply